How to Make a Mudbrick
Get a step by step look at the process
• 11/08/2018
While perhaps not all BAR readers have the time and resources to replicate an Iron Age gate or Byzantine mosaic, anyone can make a mudbrick! The recipe is simple—and the ingredients common: As long as you have access to mud, water and straw (or another type of organic material), you, too, can mimic the manufacturing process used by ancient Egyptians—and Israelite slaves—to make mudbricks.In the summer of 2013, archaeologists at Tell Timai made mudbricks to conserve the ancient walls at their site in the Nile Delta. Robert Littman, Marta Lorenzon, and Jay Silverstein describe the process in "With and Without Straw: How Israelite Slaves Made Bricks," published in the March/April 2014 issue of BAR.
Their efforts produced great results, and although time-consuming, their procedures can be followed to create mudbricks of your own:
1. Mix topsoil and water to create a thick mud.
2. Add straw. While the composition of the mud will affect the exact proportions, as a general rule, add a half pound of straw for every cubic foot of mud mixture. If you have access to grain chaff (a byproduct of threshing), you can use that as temper. If not, chop straw into very small pieces—called straw chaff—and use that.
3. Knead the mud mixture with your bare feet for four days.
4. Once it has fermented (after four days of kneading), leave the mixture alone for a few days.
5. Knead the mixture again on the day you plan to form your mudbricks.
6. Pour the mud mixture into molds (the shape of your choosing) and let them solidify in the molds for at least 20 minutes.
7. Remove from molds and deposit on a drying floor layered with sand and straw to prevent the bricks from sticking to the floor itself.
8. Let the bricks dry for a week.
After the bricks have dried, they are ready to be used—whether to build something new or to reconstruct ancient walls!
The free eBook Life in the Ancient World guides you through craft centers in ancient Jerusalem, family structure across Israel and ancient practices—from dining to makeup—throughout the Mediterranean world.
Take a close look at the process below:

Workers at Tell Timai gathered straw and mixed it with water and mud from nearby fields.
Photo: Courtesy Robert Littman and Marta Lorenzon.

With their bare feet, the workers at Tell Timai kneaded the mud mixture for four days. Once it had fermented, the mixture was left alone for a few days.
Photo: Courtesy Robert Littman and Marta Lorenzon.
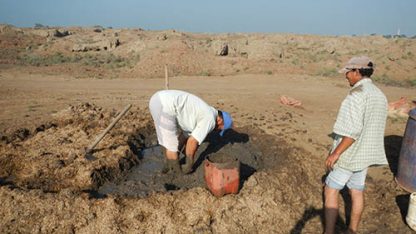
On the day the mud-bricks were formed, the mud mixture was kneaded again.
Photo: Courtesy Robert Littman and Marta Lorenzon.
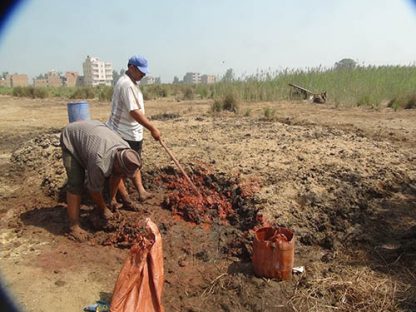
Red dye was added, so that the new mudbricks were a different color than the original, ancient mudbricks.
Photo: Courtesy Jay Silverstein.
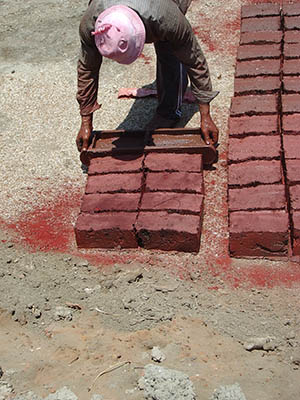
Still in their molds, the bricks were carried to the drying floor. They were then removed from their molds and left to dry for a week.
Photo: Courtesy Robert Littman and Marta Lorenzon.

In two days, the team at Tell Timai produced almost 2,000 mudbricks.
Photo: Courtesy Robert Littman and Marta Lorenzon.
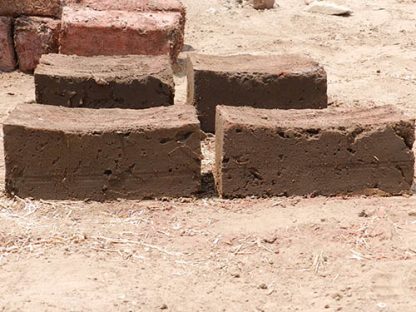
As an experiment, they made some bricks without straw. These bricks were fragile and easily broken, demonstrating the importance of straw in brickmaking. When Pharoah stopped giving the Israelite slaves straw for their bricks, it was still necessary for them to gather it on their own (Exodus 5:6–8, 10–13).
Photo: Courtesy Robert Littman and Marta Lorenzon.
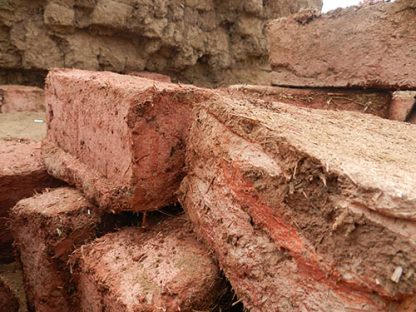
The bricks with straw dried well and were significantly sturdier than the bricks without straw.
Photo: Courtesy Robert Littman and Marta Lorenzon.

BAR author Marta Lorenzon injected mortar with a syringe into the ancient walls at Tell Timai to ready the walls for conservation.
Photo: Courtesy Jay Silverstein.
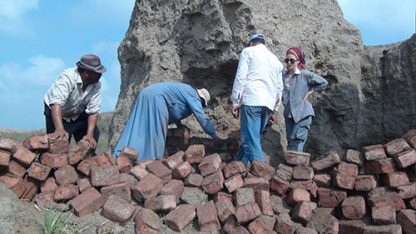
With their large supply of mudbricks, the team at Tell Timai conserved and refortified the ancient walls at their site.
Photo: Courtesy Jay Silverstein.

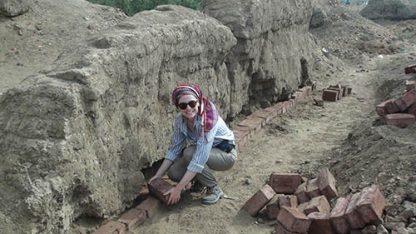
The layers of mudbricks and mortar are flush against the ancient structures.
Photo: Courtesy Robert Littman and Marta Lorenzon.
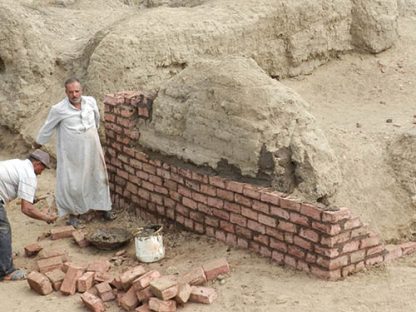
The team's wall continues to grow—brick by brick, row by row.
Photo: Courtesy Robert Littman and Marta Lorenzon.

It is easy to see the difference between the new red mudbricks and the ancient ones in the reconstructed walls.
Photo: Courtesy Robert Littman and Marta Lorenzon.

Tell Timai's walls—both the new mudbricks and the original—were encased in mud plaster.
Photo: Courtesy Robert Littman and Marta Lorenzon.
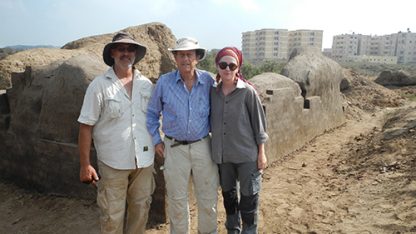
BAR authors Jay Silverstein, Robert Littman and Marta Lorenzon stand in front of the mudbrick walls at Tell Timai—now properly conserved for posterity.
Photo: Courtesy Robert Littman and Marta Lorenzon.
Subscribers: Read more about mudbricks in the ancient world in "With and Without Straw: How Israelite Slaves Made Bricks" by Robert Littman, Marta Lorenzon, and Jay Silverstein in Biblical Archaeology Review, March/April 2014.
-- Sent from my Linux system.



No comments:
Post a Comment